Configuring Custom Themes for Microsoft Teams/Skype Room Systems
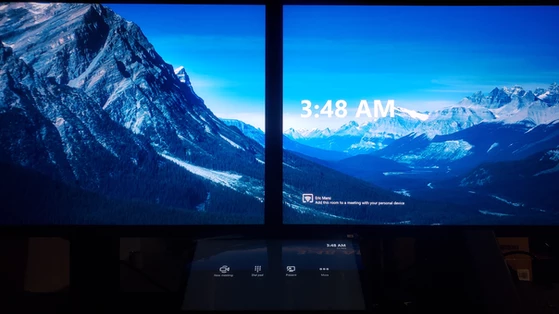
Microsoft Teams Room Systems come with a set of predefined wallpaper themes that should meet the needs of most organizations. Some organizations though prefer to take this up a level and either present a custom company branded theme or just a random scenic wallpaper (as shown above). This tutorial will guide you through the steps needed to create a custom theme that can be applied to your Microsoft Teams Rooms Systems.
This blog post was built as a collab with @PatRichard (#NotPatRichard). If you would like to have a new wallpaper set randomly on a day-to-day basis, check out his method for automating this process at this blog at: https://ucunleashed.com/4323. His PowerShell script is available from: https://github.com/patrichard/New-MtrWallpaper
Planning & Prerequisites
Prerequisites
A few prerequisites need to be addressed to ensure that your environment is ready to support these features of Cloud Auto Attendants.
• Provided Wallpaper
- This image must be exactly 3840×1080 pixels (No 1440p or 4K support and is required for single screen deployments as well).
- Easy to search for on Bing by adjusting the image requirements
- Must be a .jpg, .jpeg, .png, or a .bmp file type.
- If your organization wants to build a custom image, a graphic designer can use the Custom Theme Photoshop Template that is provided from Microsoft by CLICKING HERE
• Access to the MTR console or a Remote File Share
- Access to the MTR console will simplify the deployment, but remote deployments to multiple rooms can be achieved via remote administrative file shares by browsing to “\\<MTRHostname>\\C$\Users\Skype\AppData\Local\Packages\Microsoft.SkypeRoomSystem_8wekyb3d8bbwe\LocalState
- (May have to create a local temp share to enable the Administrative Shares)
- If this method is used, the settings will not apply until the MTR does its daily reboot at 2:30AM
Setup Process
Step 1: Create a Custom SkypeSettings XML file
In order for the MTR console to create a custom theme based on the image file that is provided, a custom XML needs to be created that defines the custom theme. Using notepad, copy/paste the following data and save it as SkypeSettings.xml
<SkypeSettings>
    <Theming>
        <ThemeName>Custom</ThemeName>
        <CustomThemeImageUrl>wallpaper.jpg</CustomThemeImageUrl>
        <CustomThemeColor>
            <RedComponent>1</RedComponent>
            <GreenComponent>120</GreenComponent>
            <BlueComponent>199</BlueComponent>
        </CustomThemeColor>
    </Theming>
</SkypeSettings>
Step 2: Transfer the XML and Wallpaper file to the MTR Console
With the XML file and image file (named wallpaper.jpg) in hand, we can begin the process of transferring this to the MTR console.
1. Launch the settings app of the MTR console by clicking More > Settings on the homepage
2. Enter Administrator credentials (Default: Administrator | sfb) and then click Windows Settings
3. This will bring you to the windows sign in screen, click “Administrator” in the bottom left and sign in using the same credentials.
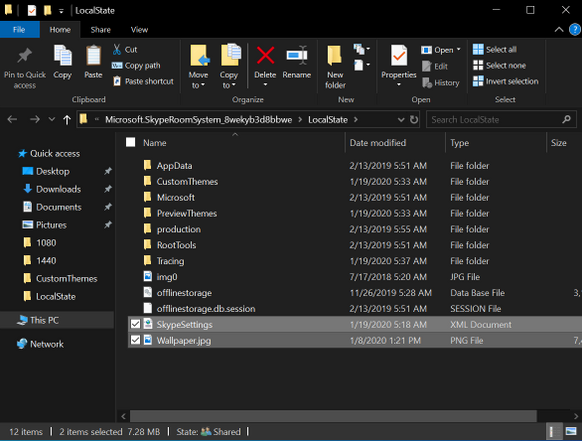
4. Once signed in open file explorer and navigate to “C:\Users\Skype\AppData\Local\Packages\Microsoft.SkypeRoomSystem_8wekyb3d8bbwe\LocalState”
NOTE: If you get an error stating the path does not exist, navigate to “C:\Users\” and double-click on the folder called Skype. Click OK to request permission to the folder and navigate again to the original path above.
5. Copy the wallpaper file and the SkypeSettings.xml file to the directory.
Step 3: Final Steps
With the XML file and image file in the correct directory, we now only need to get the drum rolling and log back into the MTR console as Skype
1. Click the start menu in the bottom left, click on the small silhouette, and then click Sign Out

2. Log back into the Skype account in the bottom left and if all goes well, the new wallpaper should be selected!

Troubleshooting
Some issues may occur during the deployment. Below are a few that may occur with their solutions. (I will try and keep this list updated if/when issues occur)
No Custom Theme is applied to the MTR console
- Verify that the image file is the correct resolution and that the file name is EXACTLY what is defined in the XML file (In this case wallpaper.jpg)
Automation
This blog post was built as a collab with @PatRichard (#NotPatRichard). If you would like to have a new wallpaper set randomly on a day-to-day basis (Much like Bing), check out his method for automating this process on this blog at: https://ucunleashed.com/4323. His PowerShell script is available from: https://github.com/patrichard/New-MtrWallpaper
Feel free to reach out by commenting below if you have any questions!

5 Comments